If you initially set up your root domain (example.com) with QUIC.cloud, but now would like to switch to using a subdomain (www.example.com) instead, it is possible to do so.
Remove Root Domain from QUIC.cloud
If example.com (without the www) is already added to QUIC.cloud, you will need to remove it first. If not, you can skip this step.
Disable QUIC.cloud CDN, if you haven’t already. From your dashboard choose example.com from the domain list, and navigate to CDN > CDN Config > QUIC.cloud CDN. Click the Disable CDN link.
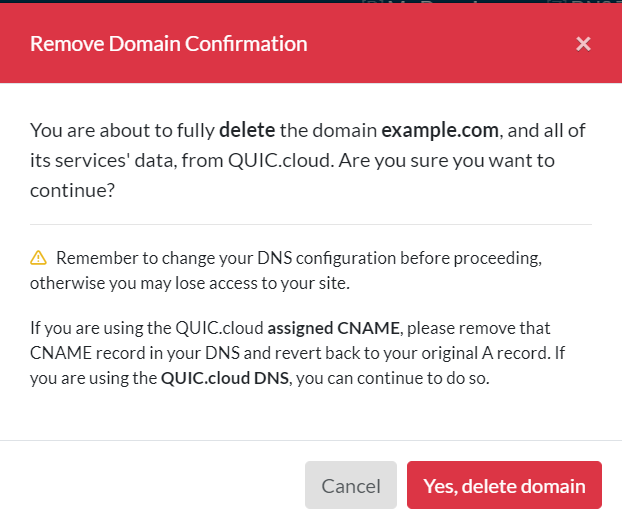
Navigate to Settings, scroll all the way down to the bottom and click the Delete domain link. When the dialog box pops up, confirm that you wish to delete the domain.
Change the Domain in WordPress Admin
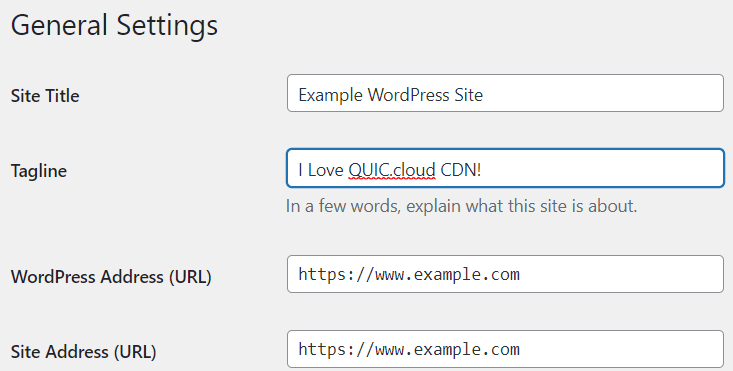
From your WordPress dashboard, navigate to Settings > General, and set both WordPress Address (URL) and Site Address (URL) to https://www.example.com. Click the Save Changes button.
Be sure to Purge All in LiteSpeed Cache, now or when you’ve finished all of the optional steps below.
Redirect Old Links (Optional)
You may wish to redirect all incoming example.com requests to www.example.com. If so, you can add this to the top of your .htaccess file:
RewriteEngine On
RewriteCond %{HTTP_HOST} ^example.com [NC]
RewriteRule ^(.*)$ http://www.example.com/$1 [L,R=301]
Search and Replace Old Links (Optional)
If you want to avoid excessive redirects from internal links, you can search and replace all instances of https://example.com in your site content with https://www.example.com. There are plugins available (such as this one) to help you with this task, but please use extreme caution. Unless you know exactly what you are doing, it’s possible to render your site completely unusable with this kind of plugin. Ask an admin or developer to help you, or at the very least, back up your site before you proceed.
Add www Domain to QUIC.cloud
From the WordPress dashboard, navigate to LiteSpeed Cache > General and request a new domain key by pressing Refresh Domain Key.
NOTE: If this is your first time generating a domain key, the button will say Request Domain Key.
Wait a few minutes for the domain key to be generated, refresh the page, and press the Link to QUIC.cloud button.
Next Steps
Your URL is now officially www.example.com on your WordPress blog, and is connected to your QUIC.cloud account. Now it is time to onboard this new URL. You’ll need to do the following: